
久々のメジャーバージョンアップとなりますが、2020年5月12日にZabbix 5.0 LTSがリリースされました。今回のバージョンアップで各機能の大幅な変更や追加が行われ、セキュリティやGo言語で記載された新たなエージェントなどが追加されました。
以下公式サイトに新機能について情報がまとめられています。
本記事では、CentOS 8上でZabbix Server 5.0とZabbix Agent2 5.0のインストール検証を行いましたので、紹介します。
CONTENTS
前提条件
以下の前提条件で構築を行っています。設定を合わせると構築時にトラブルが少なく構築可能です。
- ハードウェア: Hyper-V上の仮想マシン
- OS: CentOS 8.3
- Apache: 2.4.37
- PHP: 7.3.20
- MariaDB: 10.3.27
- Zabbix Server: 5.0.1
- Zabbix Agent 2: 5.0.1
バージョン情報は以下の通りです。
# cat /etc/redhat-release
CentOS Linux release 8.3.2011 (Core)

# uname -r
4.18.0-240.el8.x86_64Code language: PHP (php)
FIREWALLD無効化
セキュリティ上はFirewallを必要な通信のみ許可するように設定を加えた方がよいが、今回は説明簡略化のため、Firewalld無効化での説明とします。実運用の場合はFirewallへの通信許可をしてください。
次にコンソール上にて以下コマンド実行
[root@localhost umilcl]$ systemctl stop firewalld
[root@localhost umilcl]$ systemctl disable firewalld
Removed symlink /etc/systemd/system/multi-user.target.wants/firewalld.service.
Removed symlink /etc/systemd/system/dbus-org.fedoraproject.FirewallD1.service.
[root@localhost umilcl]$ systemctl status firewalld
● firewalld.service - firewalld - dynamic firewall daemon
   Loaded: loaded (/usr/lib/systemd/system/firewalld.service; disabled; vendor preset: enabled)
   Active: inactive (dead)
     Docs: man:firewalld(1)

Code language: JavaScript (javascript)
SELinux無効化
SELinux のステータスをチェックするには、getenforce または sestatus コマンドを使います。
getenforce コマンドは、 Enforcing、Permissive、Disabled のいずれかを返します。getenforce コマンドは、SELinux が有効な際に (SELinux ポリシールールが強制されている際に) Enforcing を返します。
SELINUX=disabled を追加し、SELinuxの無効化が完了したら、再起動を行います。
[root@localhost umilcl]$ getenforce
Enforcing

[root@localhost umilcl]$ vi /etc/selinux/config

# This file controls the state of SELinux on the system.
# SELINUX= can take one of these three values:
#     enforcing - SELinux security policy is enforced.
#     permissive - SELinux prints warnings instead of enforcing.
#     disabled - No SELinux policy is loaded.
#SELINUX=enforcing
SELINUX=disabled
# SELINUXTYPE= can take one of three values:
#     targeted - Targeted processes are protected,
#     minimum - Modification of targeted policy. Only selected processes are protected.
#     mls - Multi Level Security protection.
SELINUXTYPE=targeted

[root@localhost umilcl]# reboot
[root@localhost umilcl]# getenforce
DisabledCode language: PHP (php)
パッケージインストール
Zabbixの動作に必要となる各種パッケージをインストールします。
Apache
まずはrootユーザーに切り替えます。以下のコマンドを実行し、Apache及び関連付けされたソフトウェアをインストールします。
dnf -y module install httpdCode language: JavaScript (javascript)PHP
以下のコマンドを実行し、PHPをインストールします。
dnf -y module reset php
dnf -y module enable php:7.3
dnf -y install php php-mysqlnd php-gd php-xml php-bcmath php-ldap php-mbstring php-ldapCode language: JavaScript (javascript)
PHP 設定ファイルの変更
viなどのテキストエディタで、 php.ini ファイルを開きます。
cp /etc/php.ini /etc/php.ini.org
vi /etc/php.ini
PHPのタイムゾーンを変更します。 /date.timezone で検索を行い、 date.timezone = Asia/Tokyo を追加します。
[Date]
; Defines the default timezone used by the date functions
; http://php.net/date.timezone
;date.timezone =
date.timezone = Asia/TokyoCode language: JavaScript (javascript)
MariaDB
以下のコマンドを実行し、MariaDBをインストールします。
dnf module -y install mariadb:10.3Code language: JavaScript (javascript)自動起動設定 及び MariaDBの設定
まずはMariaDBの自動起動の設定を行います。
systemctl enable --now mariadbMariaDBの設定を行います。パスワードは DBrootpw としています。基本的にパスワード入力以外はyで入力します。
[root@localhost umilcl]# mysql_secure_installation

NOTE: RUNNING ALL PARTS OF THIS SCRIPT IS RECOMMENDED FOR ALL MariaDB
      SERVERS IN PRODUCTION USE!  PLEASE READ EACH STEP CAREFULLY!

In order to log into MariaDB to secure it, we'll need the current
password for the root user.  If you've just installed MariaDB, and
you haven't set the root password yet, the password will be blank,
so you should just press enter here.

# 現在のrootパスワードを聞いていきますが、設定していないので何も入力せずエンター
Enter current password for root (enter for none):
OK, successfully used password, moving on...

Setting the root password ensures that nobody can log into the MariaDB
root user without the proper authorisation.


#yでrootパスワードの設定を行います。パスワードはDBrootpwとしています。
Set root password? [Y/n] y
New password:DBrootpw
Re-enter new password:DBrootpw
Password updated successfully!
Reloading privilege tables..
 ... Success!


By default, a MariaDB installation has an anonymous user, allowing anyone
to log into MariaDB without having to have a user account created for
them.  This is intended only for testing, and to make the installation
go a bit smoother.  You should remove them before moving into a
production environment.

#yで他のユーザーを削除します。
Remove anonymous users? [Y/n] y
 ... Success!

Normally, root should only be allowed to connect from 'localhost'.  This
ensures that someone cannot guess at the root password from the network.

#yでrootでのリモートログインを禁止します。
Disallow root login remotely? [Y/n] y
 ... Success!

By default, MariaDB comes with a database named 'test' that anyone can
access.  This is also intended only for testing, and should be removed
before moving into a production environment.

#yでテストデータベースを削除します。
Remove test database and access to it? [Y/n] y
 - Dropping test database...
 ... Success!
 - Removing privileges on test database...
 ... Success!

Reloading the privilege tables will ensure that all changes made so far
will take effect immediately.

#yで権限テーブルを読み直します。
Reload privilege tables now? [Y/n] y
 ... Success!

Cleaning up...

All done!  If you've completed all of the above steps, your MariaDB
installation should now be secure.

Thanks for using MariaDB!Code language: PHP (php)
Zabbix Server
Zabbixのリリース状況によっては、新しいバージョンのパッケージが公開されます。
以下の公式リポジトリで、「zabbix-release-5.0-x.el8.noarch.rpm」のバージョンを確認して、新しいバージョンが公開されている場合は、インストール対象パッケージのURLを適宜変更してください。
https://repo.zabbix.com/zabbix/5.0/rhel/8/x86_64/
以下のコマンドを実行し、Zabbix 5.0の公式リポジトリをインストールします。
rpm -Uvh https://repo.zabbix.com/zabbix/5.0/rhel/8/x86_64/zabbix-release-5.0-1.el8.noarch.rpm
dnf clean allCode language: JavaScript (javascript)
以下のコマンドを実行し、Zabbix Serverの関連パッケージをインストールします。
dnf -y install zabbix-server-mysql zabbix-web-mysql zabbix-apache-conf zabbix-agent2 zabbix-web-japanese
Zabbix用DB作成とパスワード設定
ZabbixのDBを作成します。パスワードは先ほど作成した DBrootpw となります。入力後対話画面となるので、DBを作成し、管理用のパスワード ZabbixDBPw を設定します。
mysql -uroot -p
Enter password:DBrootpw
create database zabbix character set utf8 collate utf8_bin;
grant all privileges on zabbix.* to zabbix@localhost identified by 'ZabbixDBPw';
quit;Code language: CSS (css)
Zabbix用DBの初期設定を行います。パスワードの問い合わせがあるので 上記で設定した ZabbixDBPw を入力します。
zcat /usr/share/doc/zabbix-server-mysql*/create.sql.gz | mysql -uzabbix -p zabbix /etc/zabbix/zabbix_server.conf の DBPassword= にZabbixDBのパスワードを設定します。先ほど設定したパスワード ZabbixDBPw を設定してください。
cp /etc/zabbix/zabbix_server.conf /etc/zabbix/zabbix_server.conf.org
vi /etc/zabbix/zabbix_server.conf

### Option: DBPassword
#       Database password.
#       Comment this line if no password is used.
#
# Mandatory: no
# Default:
DBPassword=ZabbixDBPw
Code language: PHP (php)
PHPのタイムゾーン変更
/etc/php-fpm.d/zabbix.conf のタイムゾーン設定を php_value[date.timezone] = Asia/Tokyo に変更します。
cp /etc/php-fpm.d/zabbix.conf /etc/php-fpm.d/zabbix.conf.org
vi /etc/php-fpm.d/zabbix.conf

php_value[upload_max_filesize] = 2M
php_value[max_input_time] = 300
php_value[max_input_vars] = 10000
; php_value[date.timezone] = Europe/Riga
php_value[date.timezone] = Asia/Tokyo
Zabbix Agent2
今回はZabbix Agent2を導入していきます。Zabbixのエージェントは「Zabbix Agent」と「Zabbix Agent2」があります。詳細は以下に記載されていますが、簡単な違いとしては以下です。
🔗18 Agent vs agent 2 comparison
| 項目 | Zabbix Agent | Zabbix Agent2 |
|---|---|---|
| サポートされるOS | Linux, IBM AIX, FreeBSD, NetBSD, OpenBSD, HP-UX, Mac OS X, Solaris: 9, 10, 11, Windows | Linux, Windows |
| 監視項目 | 旧来の監視項目 | 旧来の監視項目に加え、Zabbix Native Monitorが可能。 例:Docker, Memcache, MySQLなどをネイティブ監視。 |
上記以外にもメリット・デメリットはありますが、Linux、Windowsにおける監視エージェントは「Zabbix Agent2」を使用しておくことを推奨します。一方で、「Zabbix Agent2」が対応していないOSでは「Zabbix Agent」を使います。
設定内容
viなどのテキストエディタで、Zabbix Agent 2の設定ファイルを開きます。
vi /etc/zabbix/zabbix_agent2.conf設定変更内容は以下の通りです。
監視を受け付けるサーバに関する設定を行います。
# 監視通信を許可するサーバIPアドレス
# Zabbixサーバ自身を監視する場合は値を変更しない
# 別サーバへエージェントをインストールする場合は、ZabbixサーバのIPアドレスを指定する

Server=127.0.0.1

# アクティブチェック監視データの送信先サーバIPアドレス
# Zabbixサーバ自身を監視する場合は値を変更しない
# 別サーバへエージェントをインストールする場合は、ZabbixサーバのIPアドレスを指定する

ServerActive=127.0.0.1

# 自ホストのホスト名
# OS上のホスト名ではなく、Zabbix監視設定上のホスト名

Hostname=Zabbix serverCode language: PHP (php)
サービス起動
Apache
以下のコマンドを実行し、Apacheの自動起動設定とサービス起動を行います。
# systemctl enable httpd
Created symlink /etc/systemd/system/multi-user.target.wants/httpd.service → /usr/lib/systemd/system/httpd.service.

# systemctl start httpdCode language: PHP (php)
PHP-FPM
以下のコマンドを実行し、PHP-FPMの自動起動設定とサービス起動を行います。
# systemctl enable php-fpm
Created symlink /etc/systemd/system/multi-user.target.wants/php-fpm.service → /usr/lib/systemd/system/php-fpm.service.

# systemctl start php-fpmCode language: PHP (php)
Zabbix Server
以下のコマンドを実行し、Zabbix Serverの自動起動設定とサービス起動を行います。
# systemctl enable zabbix-server
Created symlink /etc/systemd/system/multi-user.target.wants/zabbix-server.service → /usr/lib/systemd/system/zabbix-server.service.

# systemctl start zabbix-serverCode language: PHP (php)
Zabbix Agent2
以下のコマンドを実行し、Zabbix Agent2の自動起動設定とサービス起動を行います。
# systemctl enable zabbix-agent2
Created symlink /etc/systemd/system/multi-user.target.wants/zabbix-agent2.service → /usr/lib/systemd/system/zabbix-agent2.service.

# systemctl start zabbix-agent2Code language: PHP (php)
WebUIの設定
初期設定ウィザード
WebUIの初期設定を行うため、作業端末のWebブラウザを起動して以下のURLにアクセスします。
http://<ZabbixサーバIPアドレス>/zabbix/
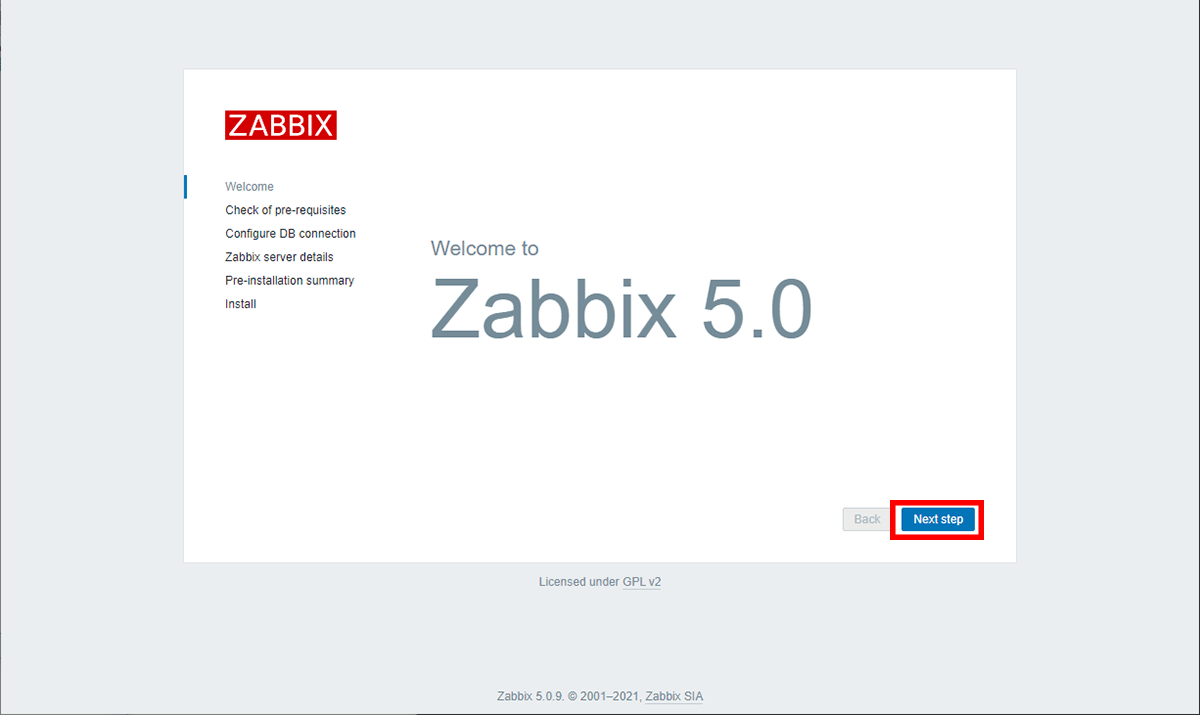
画面が表示されたら、「Next step」を押下します。
全ての項目が「OK」になっていることを確認して、「Next step」を押下します。

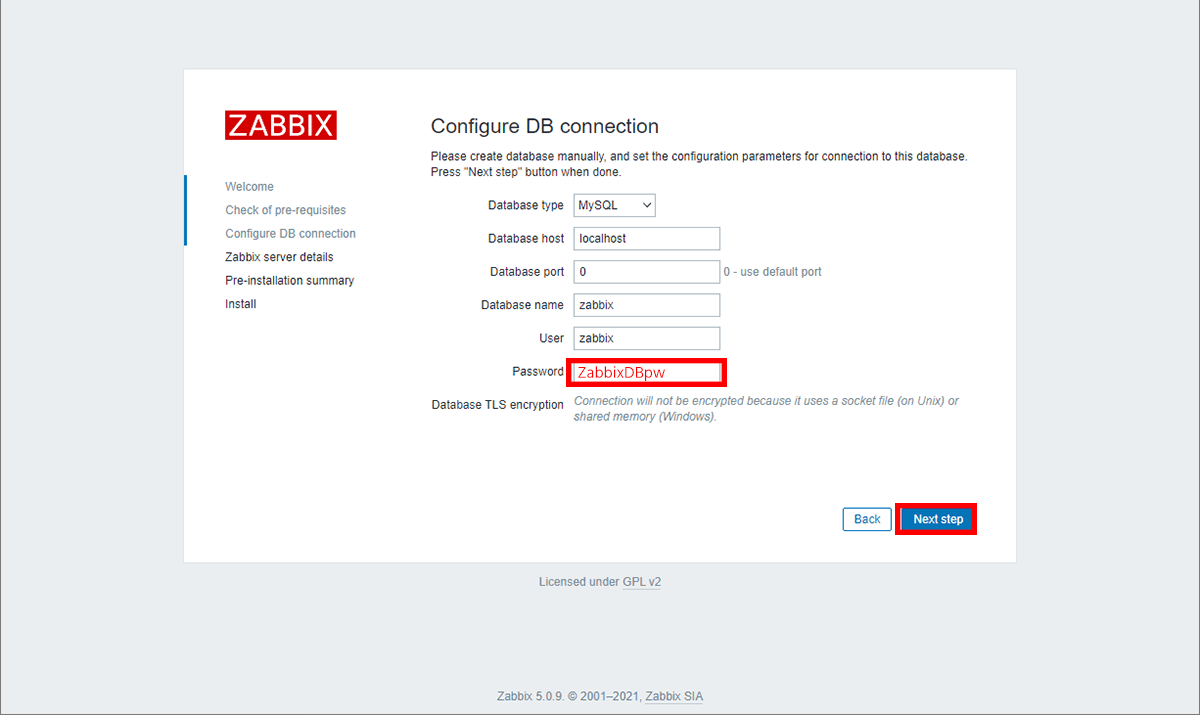
「Password」の箇所に、DBユーザzabbixのパスワード: ZabbixDBPw を入力し、「Next step」を押下します。
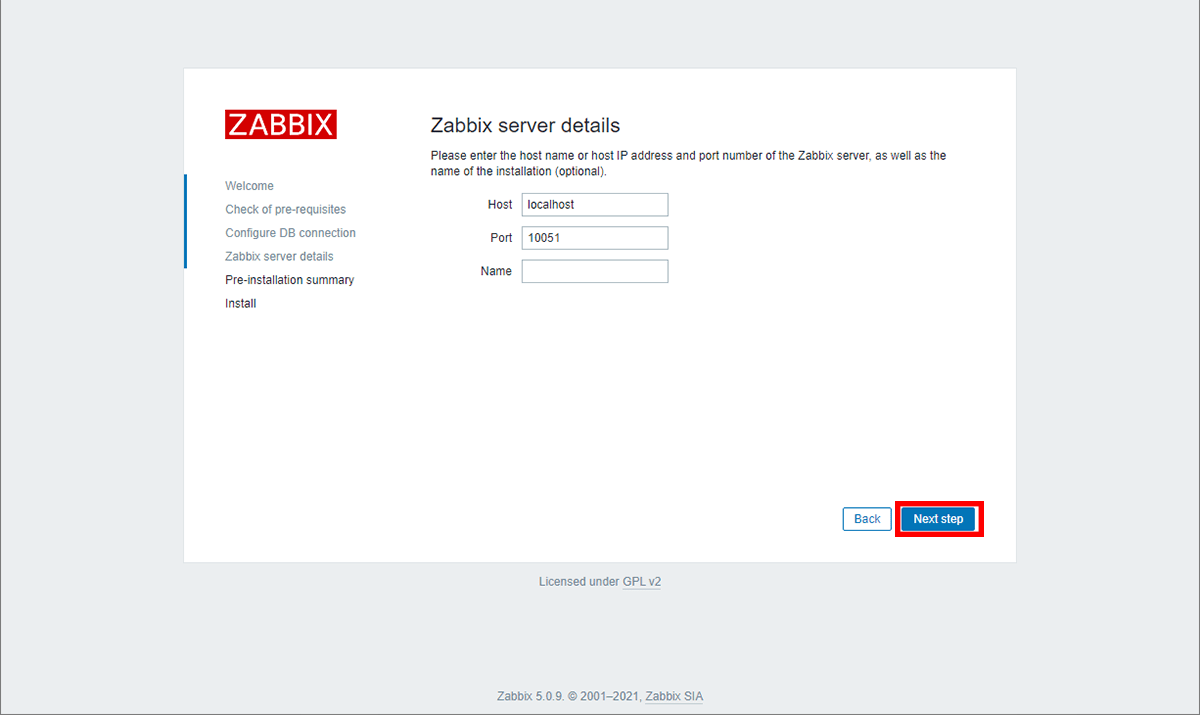
今回は、WebUIを動作させるPHP-FPMとZabbix Serverが1台のサーバに入っているため、WebUIの接続先Zabbix Server設定の変更は特に不要です。「Next step」を押下します。
設定内容を確認し、「Next step」を押下します。

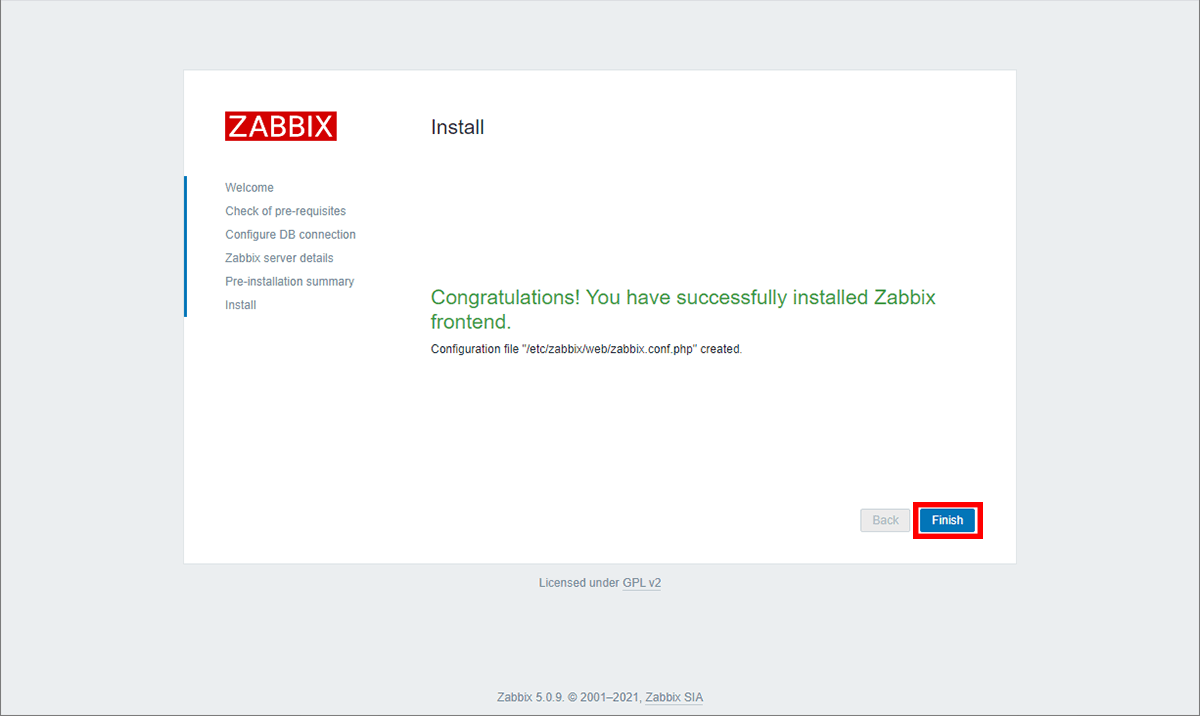
すべての設定が完了しました。「Finish」を押下します。
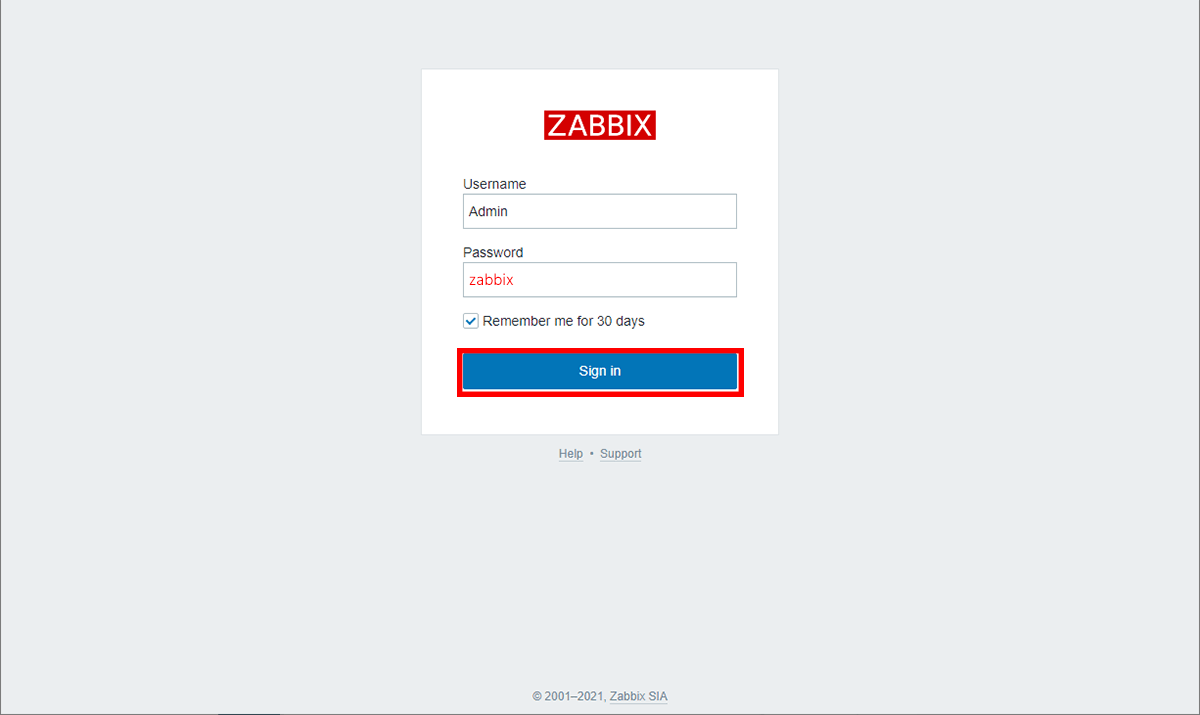
設定が完了すると、ログイン画面に遷移します。初期ユーザ名「Admin」、初期パスワード「zabbix」を入力し、「Sign in」を押下します。
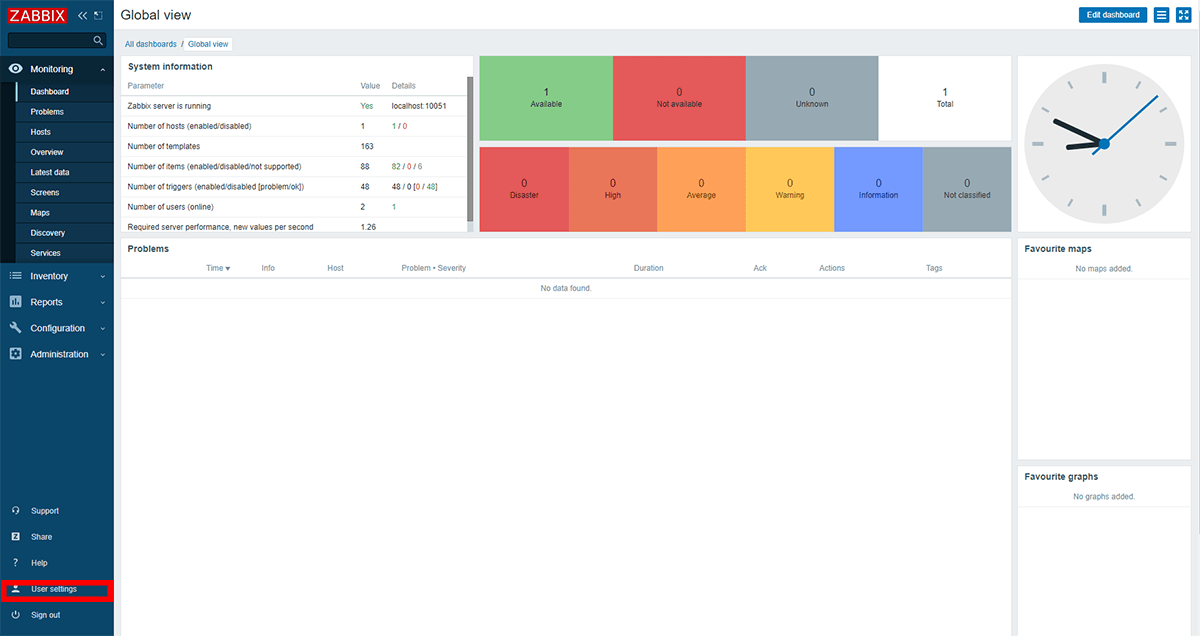
ダッシュボードが表示されることを確認し、WebUIの初期設定は完了です。
WebUIの日本語化
以下のスクリーンショットを見てもらえばわかりますが、初期状態では英語表記なので、日本語化を行います。
ダッシュボード左ペインの下部にある「User settings」を押下します。
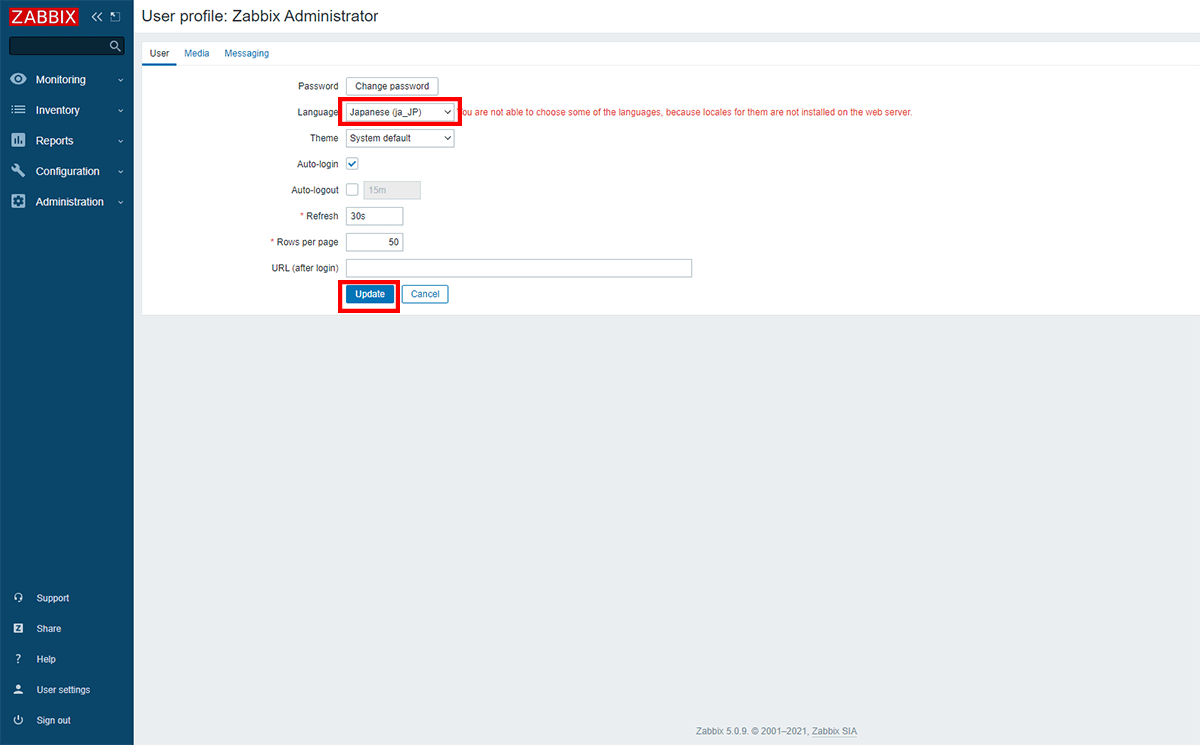
「Language」の項目を「Japanese (ja_JP)」に指定し、「Update」を押下します。
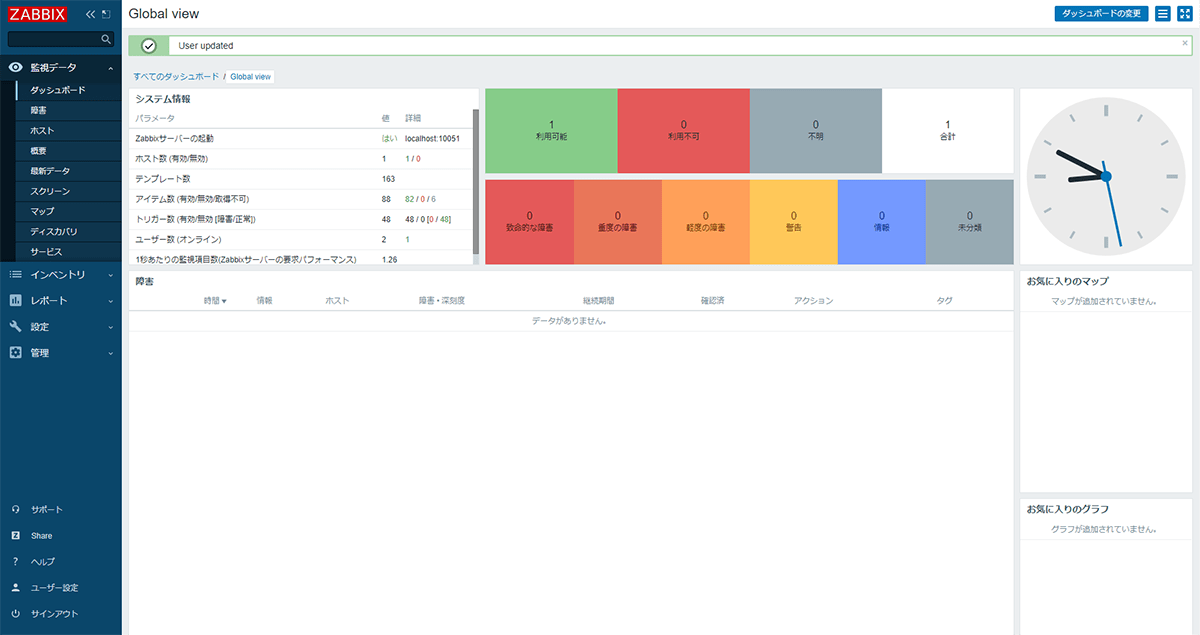
再度ダッシュボードへ画面遷移し、日本語表示に切り替わっていることを確認します。
まとめ
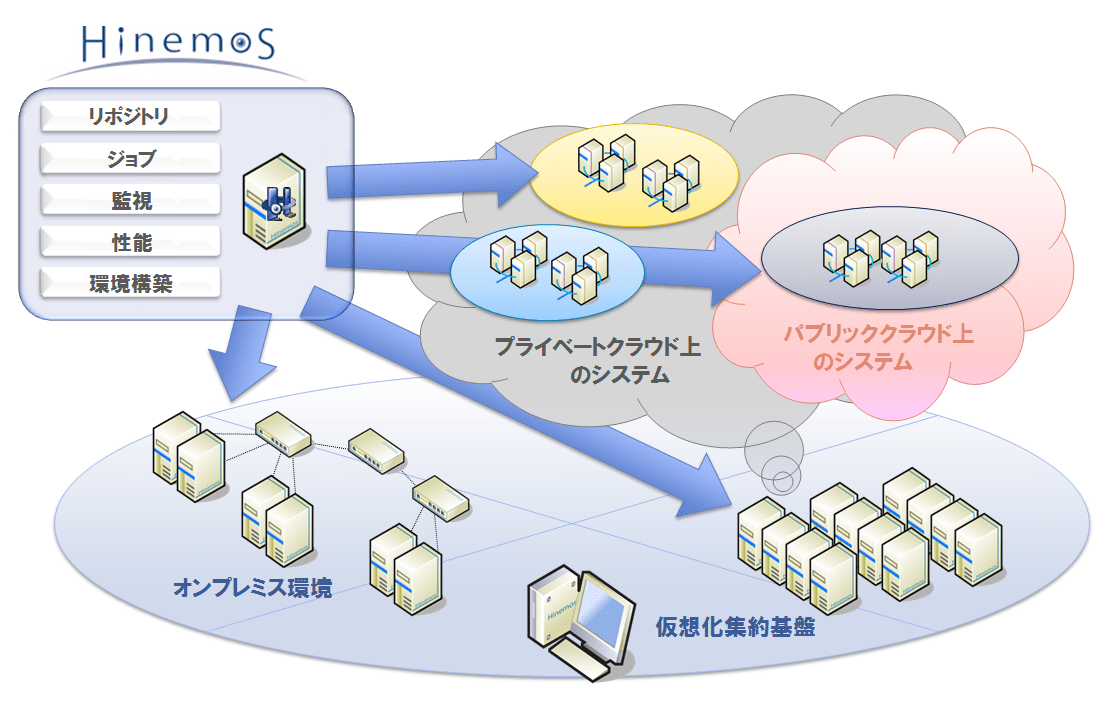
今回は新しくなった「Zabbix 5.0」の構築を検証してみました。「Hinemos」は良く構築していたのですが、Zabbixは無料でネットワーク構成図等を作成できるので、その点はHinemosよりはおすすめできます。
あとはもともと用意されているテンプレートが多いのもZabbixの特徴ですね。HinemosはNTTデータが作成しているので、日本語で分かりやすい点と監視機能やジョブ機能が優秀な点がおすすめとなります。
どちらも一長一短あるため、それぞれあったソフトウェアを使用することをおすすめします。Hinemosの紹介は以下で行っているので、参考にしてみてください。
また、今回のバージョンからシステム要件としてPHPが7.2以上となり、RHEL7およびCentOS7では、同OS標準のPHPは5.6のため、別途PHP7系をインストールする必要があります。そのため、今後導入するシステムにおいてはRHEL8またはCentOS8をお勧めします。
